To do smaller customizations on your site without changing themes (e.g., to change font size or color), you will need to edit your theme CSS. There are two ways you can do this:
- Go to Genesis > Design Palette Pro and under Settings select your theme. Then feel free to make any changes you want, which will be reflected in the preview image at right. Click Save Settings, or to undo all the changes you made click Settings > Reset. (Note: the Reset button is a good way to fix problems you didn’t introduce! Consider doing this first, then make other edits as needed.)
- If you’d like to do more custom edits, or if Design Palette Pro doesn’t yet support your theme, activate the Custom CSS module in your Jetpack and enter CSS code. You may need to purge your browser cache to see the changes reflected on your site. See below for more information on customizing your theme’s look and functionality.
When making edits to colors, fonts, and other items on your site you will often want to do this via Genesis > Design Palette Pro, as mentioned above. There are styling items that Design Palette Pro doesn’t address, however, and these edits are generally of two kinds: functionality edits in the theme’s functions.php file, or style edits in the theme’s styles.css file. We don’t always need to directly edit these files themselves, so instead we can use the Jetpack Custom CSS module and the Code Snippets PHP plugin.
Which plugin needs to be installed depends on if you are editing style or functionality. See below for more information:
-

Click to expand
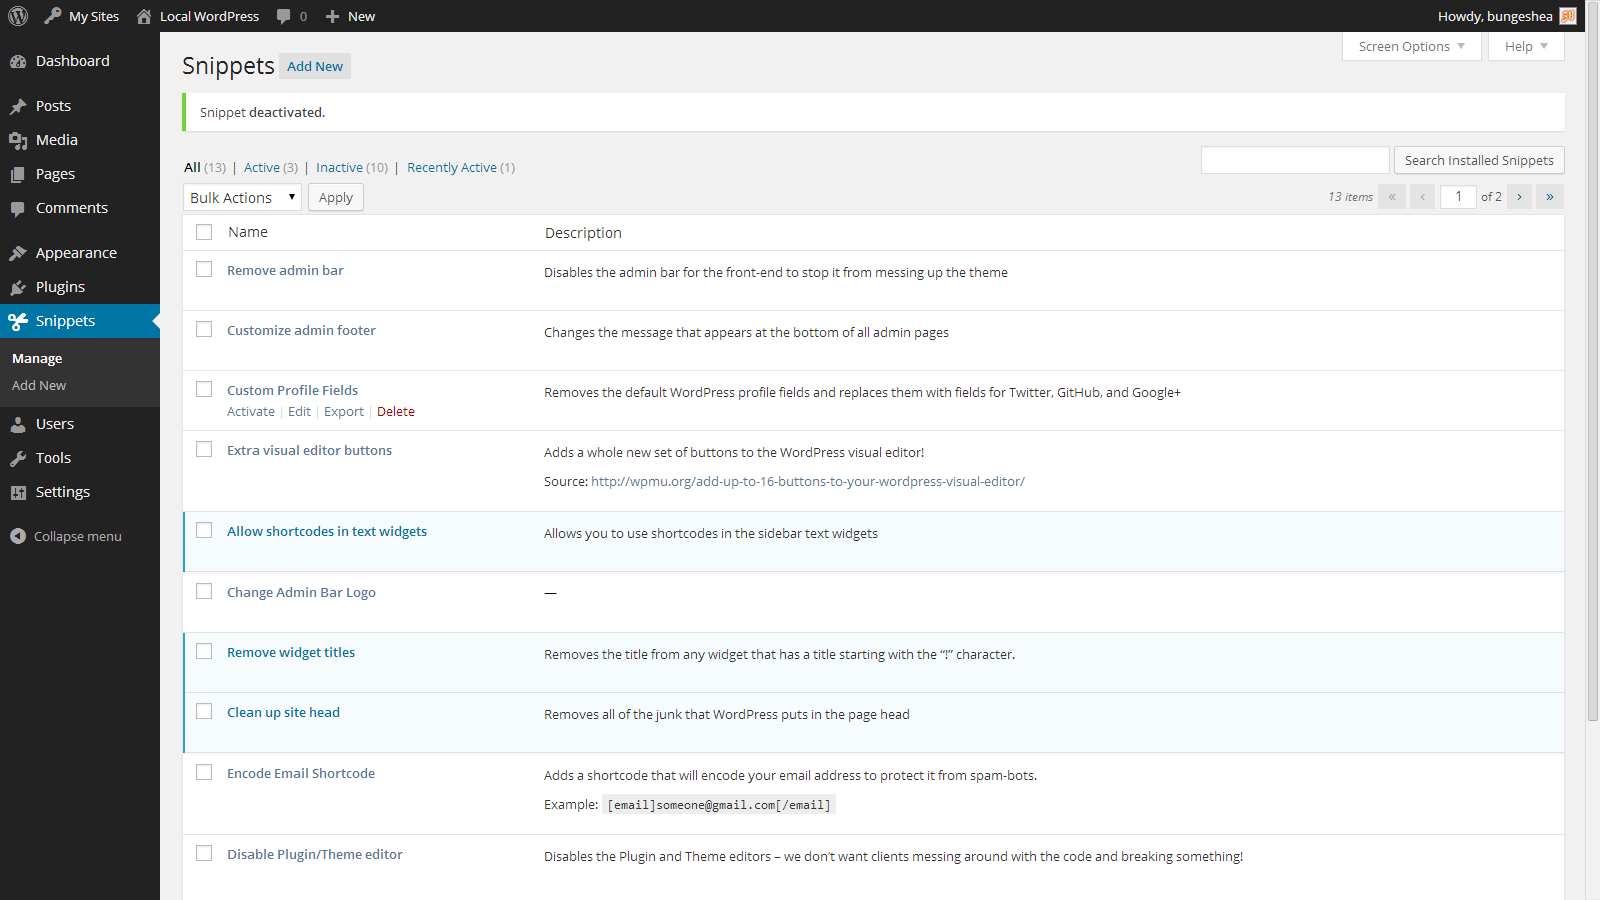
The Code Snippets plugin allows you to create custom code snippets which can be added to your active theme’s functions.php file. The plugin makes it easy to do this by providing an interface for adding snippets and running them on your site without the hassle of editing the theme’s functions.php file directly. Code Snippets provides an interface similar to the Plugins menu, so the Snippets you add can can be activated and deactivated, just like plugins. See the image to the right as an example.
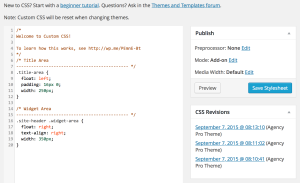 The Jetpack Custom CSS module allows you to add your own styles or override the default CSS for your theme. To use, go to Appearance > Edit CSS, enter your custom CSS, then click “Save Stylesheet” so the theme’s code will be overwritten.
