Setting up menus is a good way to help organize your site and make it more navigable for your viewers. Your site will come with a default menu that you may edit as you wish, or keep the same. You may wish to keep the default until you have more content on your site. You may also need to create a new menu when you start a new project.
Create or edit a menu
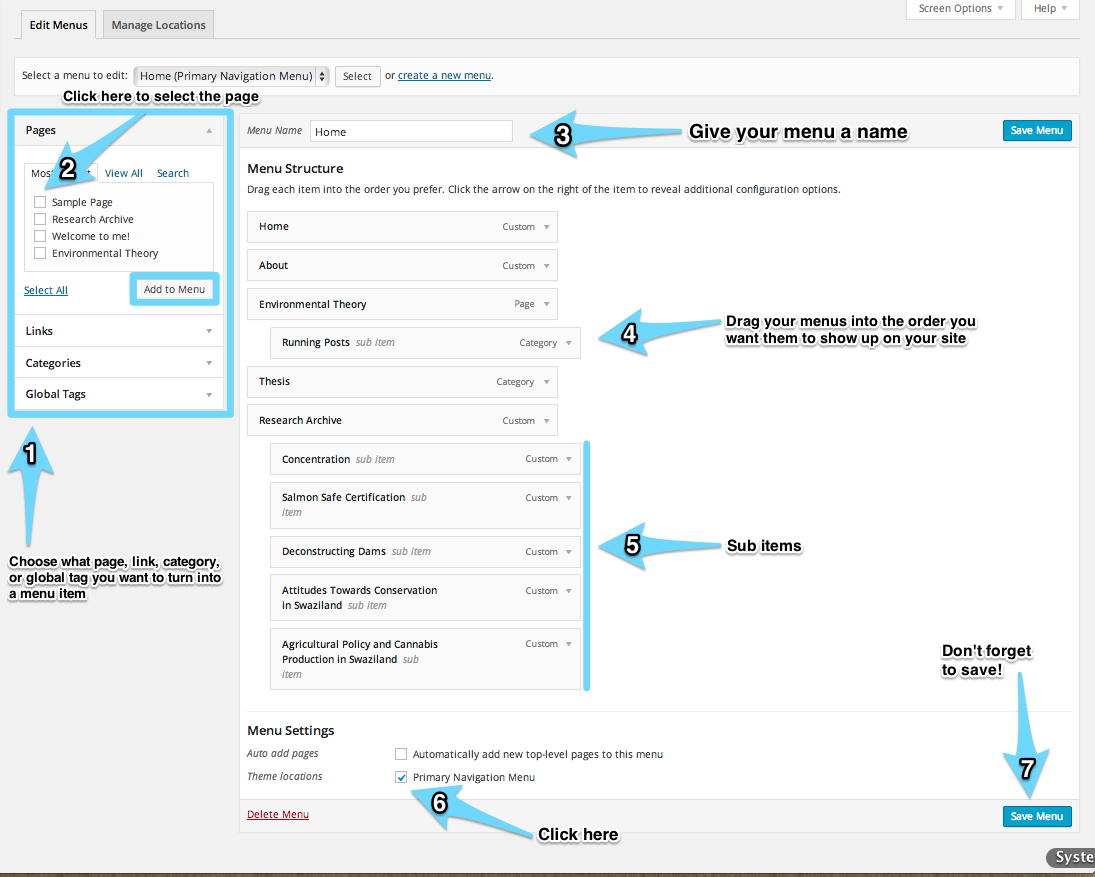
Click image to expand
- Select Appearance > Menus to get to the menu editor. You’ll see a menu editor window like the image to the right.
- There are a few ways to make menus on your site. Typically, you will choose to create a menu item from Pages, Links, or Categories. You can find out more details about the difference between these three options and how to use them here.
- Once you have all of the pages, links, and categories organized, it’s really easy to transfer them into a menu on your page. Just click the box next to the page, link, category, or global tag you want and then click Add to Menu. Often you will see that root level menu items are not clickable, like on the demo DS site. To make menu items like this, click on Link and put just a pound sign (#) in the URL box. Then give it a title and click Add to Menu.
- In the future, you may have multiple menus that appear different places on your site so make sure to give each of your menus a recognizable name. When you return to edit your menus, be sure to select the one you want to edit from the Select a menu to edit drop down list.
- After you’ve added an item to your menu it will appear at the bottom of the right column. You can change the order menus items appear on your site by dragging them above or below each other.
- To create a sub menu or sub item, drag the menu item under and to the right of another menu item that you’ve already created.
- Check Primary Navigation Menu so that your site reflects your new menu configuration, if you plan on using this menu for navigation. If you are creating a menu for a project, leave this box unchecked.
- Save your new menu before you leave the page.